This is a beginning lavel design tutorial. In this article you will find How to Create Nice Inset Text Button in Photoshop. this is very quick and easy graphic design tutorial.I hope you will enjoy this tutorial.
Final Preview
This is what we gone do today
Step #1
Open photoshop and create a new document, mine is 550px×356px with a white background.
Step #2
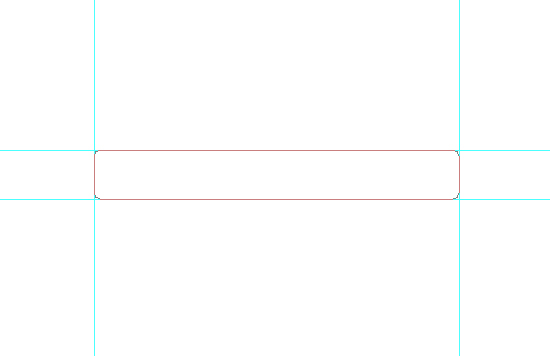
Select the Rounded Rectangle Tool and create button, mine radius is 6px.
Now we will apply some effect
Gradient Overlay
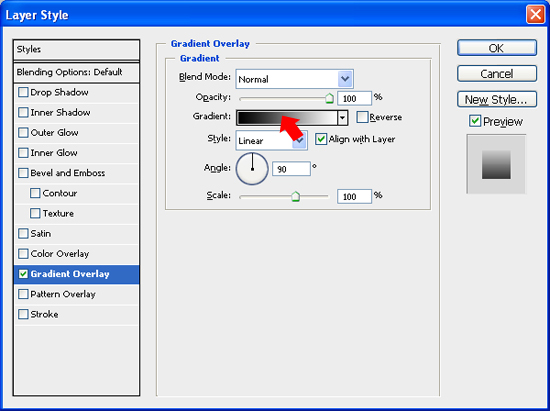
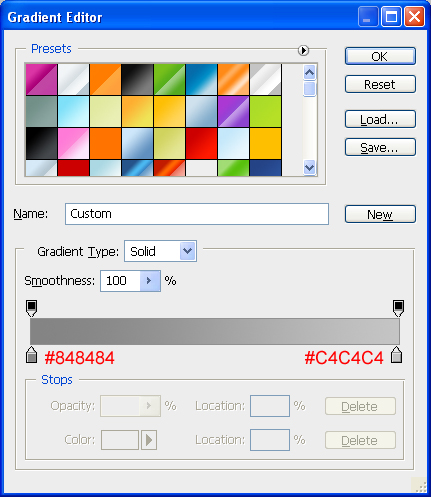
Styling the Button double-click on the Button Layer’s thumbnail in the Layers Panel to open up the Layer Styles dialog box, we will apply a vertical gradiant effect for your Button. Then click on the color gradient on the right of the Gradient option to open up the Color Gradient Editor.
Double-click on left-color-stop and enter the color value #848484, then double-click on right-color-stop and enter the color value #C4C4C4.
Drop Shadow
Next apply the Drop Shadow layer style. Keep the angle at 120o, than changing the values of Opacity, Distance and Size. I choose to set the Opacity at 47%, Distance at 2px and Size at 4px.
Should look like this.
Stroke
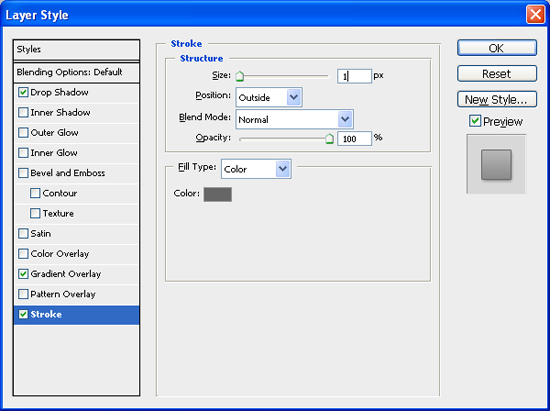
Next we will apply the Stroke. First changing the values of Size. I choose to set the Size at 1px, Position at Outside. I choose to set the Opacity at 100%. Change the Stroke color from the default to #666666
Should look like this.
Step #3
Select Horizontal Type Tool and type text on front.
Now we will apply some effect for text.
Color Overlay
Double-click on the Text layer’s thumbnail in the Layers Panel to open up the Layer Styles dialog box. First we will apply color overlay, i choose the colour #303030
Inner Shadow
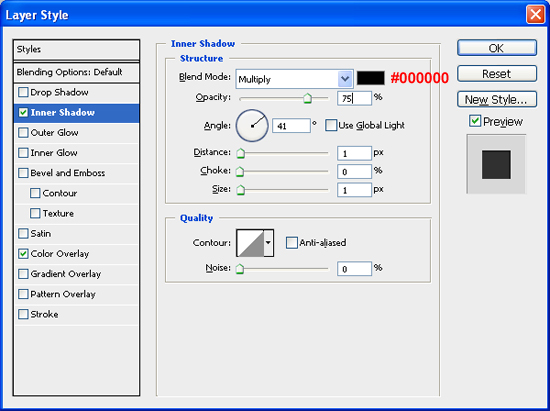
Next apply the Inner Shadow layer style. Most Important Part keep the Angle at 41o, than changing the values of Opacity, Distance and Size. I choose to set the Opacity at 75% and Distance at 1px and Size at 1px.
Drop Shadow
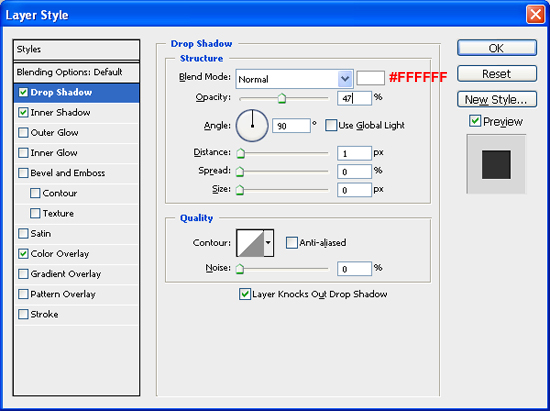
Finally we will apply the Drop Shadow, first change the Blending option to Normal. Change the Shadow Color from the default to #FFFFFF. Keep the Angle at 90o, than changing the values of opacity and Distance. I choose to set the Opacity at 47% and Distance at 1px.
Result
If you’d like to check your work, you may download the PSD file for this tutorial
if you would like to receive more inspiration from us, please consider subscribing to our feed by RSS or by email.






Great effect, very useful and looks fantastic, thanks for the helpful tutorial.
.-= Sam Logan´s last blog ..Very cool Flash website? =-.
Pingback: gradiant